Water Treatment Taste Test

Water Treatment Taste Test

Image result for water storage in garageWe all know that in the event of a large-scale disaster, treated water supplying the greater Portland area may be compromised by damaged treatment plants or supply lines. It is important to stock up water for at least two weeks (1 gallon per person per day).

Many people are acquiring large water containers (typically 55 gallons) and flushing them out 1-2 times per year. Depending on how clean the water container is, it might be necessary to treat the water to avoid any gastrointestinal illnesses that may occur due to bacteria/virus/protozoa growth, or even just to add peace of mind that what you are drinking is in fact safe.

At the annual Sunnyside Neighborhood Emergency Team (NET) holiday party, members and applicants took part in an important part of emergency preparedness: water treatment testing. (There ain’t no party like a NET party!)

METHODOLOGY 

Four treatment methods were used on nine-month old tap water from a sterilized backyard storage container and water from Laurelhurst Pond. 

The treatment methods included: 

  • Bleach (8 drops/gallon)
  • Aquatabs® (active ingredient: sodium dichloroisocyanurate)
  • Potable Aqua® aka iodine tablet (active ingredient: tetraglycine hydroperiodide)
  • Potable Aqua® plus iodine taste/color neutralizer
  • Hand pumped water purifier (First Need®, but there are many others on the market)

The pond water was only treated with the filter method for safety reasons, namely to remove particulates. All treatment methods left the water to stand at least 30 minutes before consumption, according to instructions. The purifier did not require any standing time, but it should be noted that filters and purifiers generally pump out water at a rate of 2 quarts per minute. 

RESULTS

Participants blind-tested each sample and voted for their favorite and least favorite. Image result for first need water filter

  • Least Favorite: Hands down the least favorite was the iodine method prior to neutralizing the taste/color. This sample stood out from the rest due to its yellow hue that reminded people of urine or apple juice.
  • Favorites: The favorite was the purified tap water, followed by purified pond water. These samples had no discoloration and little or no chemical smell (unlike chlorine and iodine).
  • Important! The purifier was the only method that physically removed potential harmful particles in the water rather than adding a chemical to denature any live bacteria/protozoa/viruses. But it’s important to note that a water purifier is different from a water filter, which does not remove the smallest particles (such as viruses).

TAKEAWAYS

Not all systems are 100% effective against all life stages of protozoaImage result for aquatabs

Cryptosporidium is a microscopic parasite that is naturally found in freshwater systems, including lakes, ponds, streams, and rivers. It is resistant to chlorine and other chemical methods. Boiling water for one minute is an effective method to deactivate the parasite. Water purifiers can be used to remove the parasite. For a water purifier to be effective in removing Cryptosporidium, it should be able to remove particles one micron or less. For more information on Cryptosporidium and a guide to selecting a water filter or purifier, visit the CDC’s website.

Choose a method that will work best for you and your family. 

Image result for Potable Aqua

Cost, time of decontamination, ease of use, expiration date, existing health conditions, and taste of the treated water are all things to consider. Always read the fine print before purchasing a chemical treatment method. Iodine based treatment methods must be avoided by pregnant people and anyone with a thyroid condition. Prolonged use of these chemicals is usually not recommended. If you are concerned with the taste of treated water, you may consider including a taste enhancer in your preparedness kit (e.g. Kool-Aid, Tang, Emergen-C, etc.).

Image result for bleach

By far, the least expensive method we tested was bleach. 

Chlorine bleach is inexpensive and widely available. A small container can purify a large amount of water. Bleach with added scents should not be used for water treatment. Opened containers of bleach can lose their effectiveness by off-gassing active ingredients. If you choose this method, you should have an unopened container in your preparedness kit.

Treatment tabs are expensive and no more effective than bleach. 

Aquatabs® and Potable Aqua® were more expensive than bleach, with similar effectiveness. Depending on where you purchase these products, the cost to treat one gallon of water is approximately $0.67 for Aquatabs® and $1.83 for Potable Aqua®. The benefit of these tabs is that they are in a solid, user-friendly pill form, so they won’t leak or spill like liquids.

Good water filters and purifiers are expensive.

The difference between a water filter and a water purifier is the size of the microorganism it will remove. Water filters physically strain out protozoan cysts and bacteria. Water purifiers also combat viruses, which are too tiny for most filters to effectively catch. Our First Need® water purifier removed particles up to 0.4 micron, but it has a high initial cost. Good water purifiers can cost $100 or more (and some are much, much more) but they can purify hundreds of gallons of water with the same cartridge, making this method cheaper in the long run than the two brand-name methods. The downside to filters and purifiers is that they can clog if using murky water or if they are not cleaned/stored properly. If you choose this method for your family, it is important to research what the filter or purifier removes and learn about proper storage, handling, and cleaning to get the maximum life out of your device. For more info, check out REI’s guide called How to Choose a Water Filter or Purifier.

Water treatment materials expire. 

For all items in an emergency preparedness kit, it is important to make sure that items have not expired, including water treatment methods. Some brands have effective dates within five years. Bleach containers that have been opened at least once should only be used for water treatment within one year due to off-gassing of active ingredients. Water filters and purifiers should be tested annually as well.

Not all water treatment methods will be the right choice for all situations. 

A household preparedness method might be different than the one in your car “go-kit.” Like all aspects of emergency preparedness, it is good to decide what is right for you. And it’s most important to plan ahead.


–Written by Ingrid Larsson (Sunnyside NET Assistant Team Leader) and edited by Laura Hall (Arbor Lodge/Kenton NET Co-Team Leader). Technical input was provided by Sarah Messier of the Portland Water Bureau.

How to Organize a NET Fundraiser Event

How to Organize a NET Fundraiser Event

Fundraisers are a great way to do outreach while making money for your Neighborhood Emergency Team’s (NET’s) supply cache. Since they’re open to the public, it’s a great opportunity to share some enthusiasm for emergency prep, even if people aren’t going to go all-in with NET training.

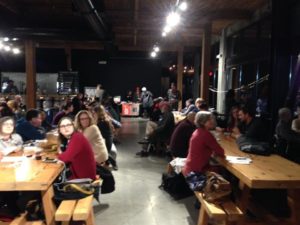
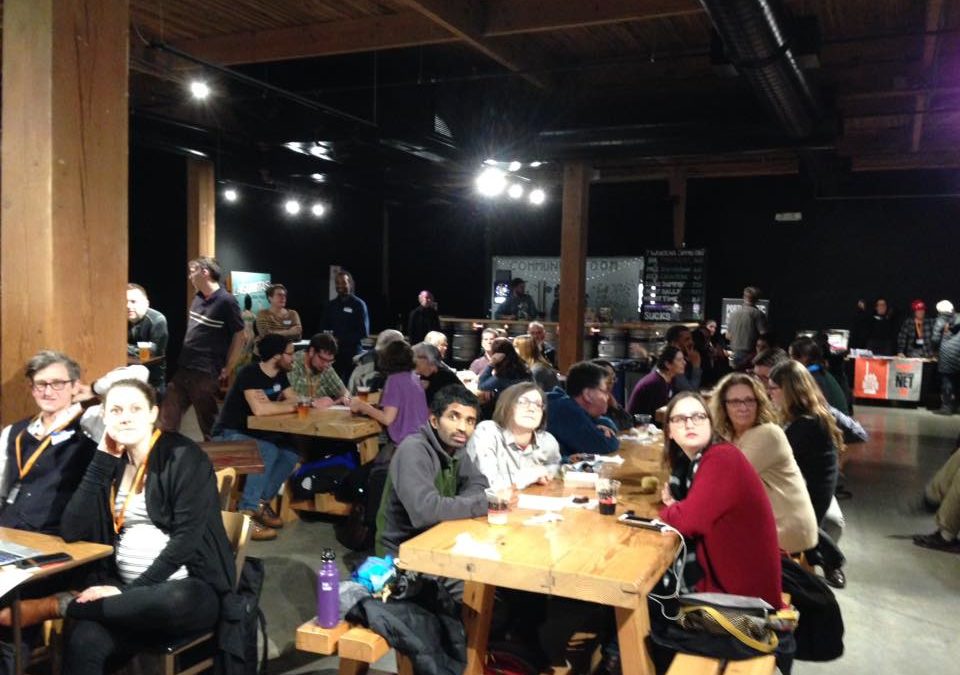
Recently, six NE Portland NETs had a great trivia fundraiser event at Lagunitas Community Room, where we had emergency prep trivia, food from La Sirenita, and lots of great drinks. We made $670, which will be split amongst the six NE NETs that participated. After the event, several people asked, “How did you do this?” and wanted to put on a similar fundraiser for their own NETs.

I also recently volunteered at another NE NET fundraiser at the Oregon Public House, which screened OPB’s Unprepared documentary and had a raffle. Based on these two experiences, I’ll summarize the process, share my thoughts, and offer some tips. Feel free to comment with your own experiences, and ask questions. If you’d like to get a copy of my trivia PowerPoint, email me at pdxboiseprepares@gmail.com.

Find a Planning Partner

It is extremely difficult to organize a successful event entirely by yourself, and why would you want to?

  1. Find another NET member to partner with, and divvy up the tasks.
  2. Find a Neighborhood Association or Coalition to take on administrative burdens like filling out event paperwork and paying fees.

Questions to Consider When Planning Your Event

  1. Which NET team(s) will your event benefit? The more teams you get involved, the more volunteers you’ll have. The trade off is that the money will be more spread out, so each team will get less. Luckily, what I’ve seen is that even if the money is only going to certain NETs, you’ll still get volunteers from outside that area that just want to help out.
  2. What entertainment and “draw” do you want to have? It’s easy to show a movie, but that can take up a lot of time and leave less time for education/outreach, networking, or other fun things. Also, everyone would have to arrive on time to see a movie. Don’t try to do too many things; it’s hard to manage and confusing for the guests. Try to focus on one thing, and do it well: trivia, a “Hecklevision” movie, a raffle, or a guest speaker.

Pick a Venue

Here are three non-profit event spaces that will donate a portion of sales or in-kind resources. Of course, you can always hold your event at any restaurant, bar, or other space that allows it. Note that if you bring your own food, someone in your group has to have an Oregon Food Handler Card.

1) Oregon Public House in the Woodlawn neighborhood of NE Portland

Your group could be the featured “Charity of the Day.” Or you could be one six featured nonprofit partners for a period of 5½ months. For each transaction during that time, customers select the nonprofit that they want to receive their proceeds.  

  • Pros: Great food menu. Good kids play area. Drinks and food can be delivered to the Ballroom upstairs after being ordered at the Pub. OPH is amenable to having you run a raffle during your event, as long as your volunteers do the work and OPH staff don’t have to be part of it. Raffle tickets can either be separately purchased or in exchange for an amount customers have already spent on food/drinks (ask how much they spent, but expecting to see their receipt is not really realistic or polite).
  • Cons: Other people will be at the restaurant who may not be aware of your Charity of the Day event, so be cognizant not to impact their normal dining experience while also politely educating them about your fundraiser. The pub itself is not a good venue for doing announcements or running any entertainment; the Ballroom upstairs is better since it has a stage, A/V capabilities, and a large open space. However, to get upstairs to the Village Ballroom, you have to go outside – there’s no inside stairway for the public (only food runners). So if you use the Ballroom, factor in the inconvenience factor. The Ballroom does not have an ADA entrance.

2) Lagunitas Community Room in the Eliot neighborhood of NE Portland

Lagunitas will give you as much free beer as you need, wooden beer tokens, and two beertenders. You must provide the rest, including food. If you bring other donated cider or wine, they’ll serve that too.

  • Pros: The space comes with large long wooden tables, a lounge, and a projector, screen and sound mixer with a microphone. They have extra folding tables you can use for info booths and to set out food. A staff person will meet with you beforehand to coach you on how to organize your event successfully, and what paperwork you’ll need to complete.
  • Cons: You still have to recruit volunteers to staff the event, ask for donated food, wine and cider, not to mention any prizes you may use for a raffle or a winning trivia team. You have to bring the entertainment, since the space itself is just a shell. The projector screen is small and in the corner, so it’s not well suited to a movie screening. It works just well enough for trivia, if you’re not relying on it too much; people may have to get up and walk up to the screen if there’s a small image they need to see for a clue. Since you’ll likely be serving food, someone will have to get an Oregon Food Handler Card and supervise the food area. There’s no kids play area. And perhaps the biggest Con is the fees – it costs $150 just for the insurance endorsement, $50 for the OLCC, and $30 for the County food permit. Working with the OLCC and the County is the most confusing and time-consuming part of the event planning. For our event, Northeast Coalition of Neighborhoods staff did this work and paid the fees.

3) Ex Novo in the Eliot neighborhood of North Portland

The entire brewery is a non-profit. They feature two local and two international charities at a time, all of which get an equal portion of the proceeds. The brewery has two dining areas; one of which is upstairs. I haven’t used them myself, so I sent them a request for more information; but after a week I haven’t heard back yet.

  • Pros: The food is good, although personally I think it can be a bit on the rich side (but you can get a pint of bacon strips for the table, which is pretty amazing).
  • Cons: It’s loud in the upstairs space, even if just one person is speaking. If you’re in the back, it’s sometimes hard to hear. A portable amp/speaker and microphone may be needed, if it’s allowed by the venue. The upstairs area’s capacity is only around 30. There’s no kids play area. It’s not a good venue for showing a movie, but it would work well for a guest speaker.

Recruit Volunteers

Based on your event plan, determine how many volunteers you’ll need and what roles they’ll have. Here are some suggestions.

  • Greeters (2): Welcome people, take donations, inform people of what to expect from the event, where to find things, etc.
  • Info Booth (2): Engage people by asking them questions, demonstrate emergency toilet set up, answer questions, offer brochures, etc.
  • Host/Emcee (1-2): Make announcements, thank sponsors, run trivia, etc.
  • Food Handlers, Bussers, Event Setup, Event Tear-Down (2-3 of each with a captain)

Use SignUp Genius or a Google Form or Google Spreadsheet to request volunteers. The free version of SignUp Genius won’t give you volunteer’s email addresses, so you’re forced to message them through the website itself. Then separately you’ll have to copy the information into a spreadsheet or Word file so you can print off the summary. It may be easier to just give out a Google Spreadsheet link and make the document public. Just make it easy to use (by formatting it well) and keep an eye on it in case someone accidentally messes it up.

Make sure the sign-up link gets shared widely:

    1. Send it to Jeremy and Ernie so it gets into the NET and BEECN newsletters.
    2. Send it out in your own NET’s newsletter.
    3. Post it to the PortlandPrepares Facebook page and any other individual NET Facebook pages.
    4. Repeat this until you’ve got all the volunteers you need.
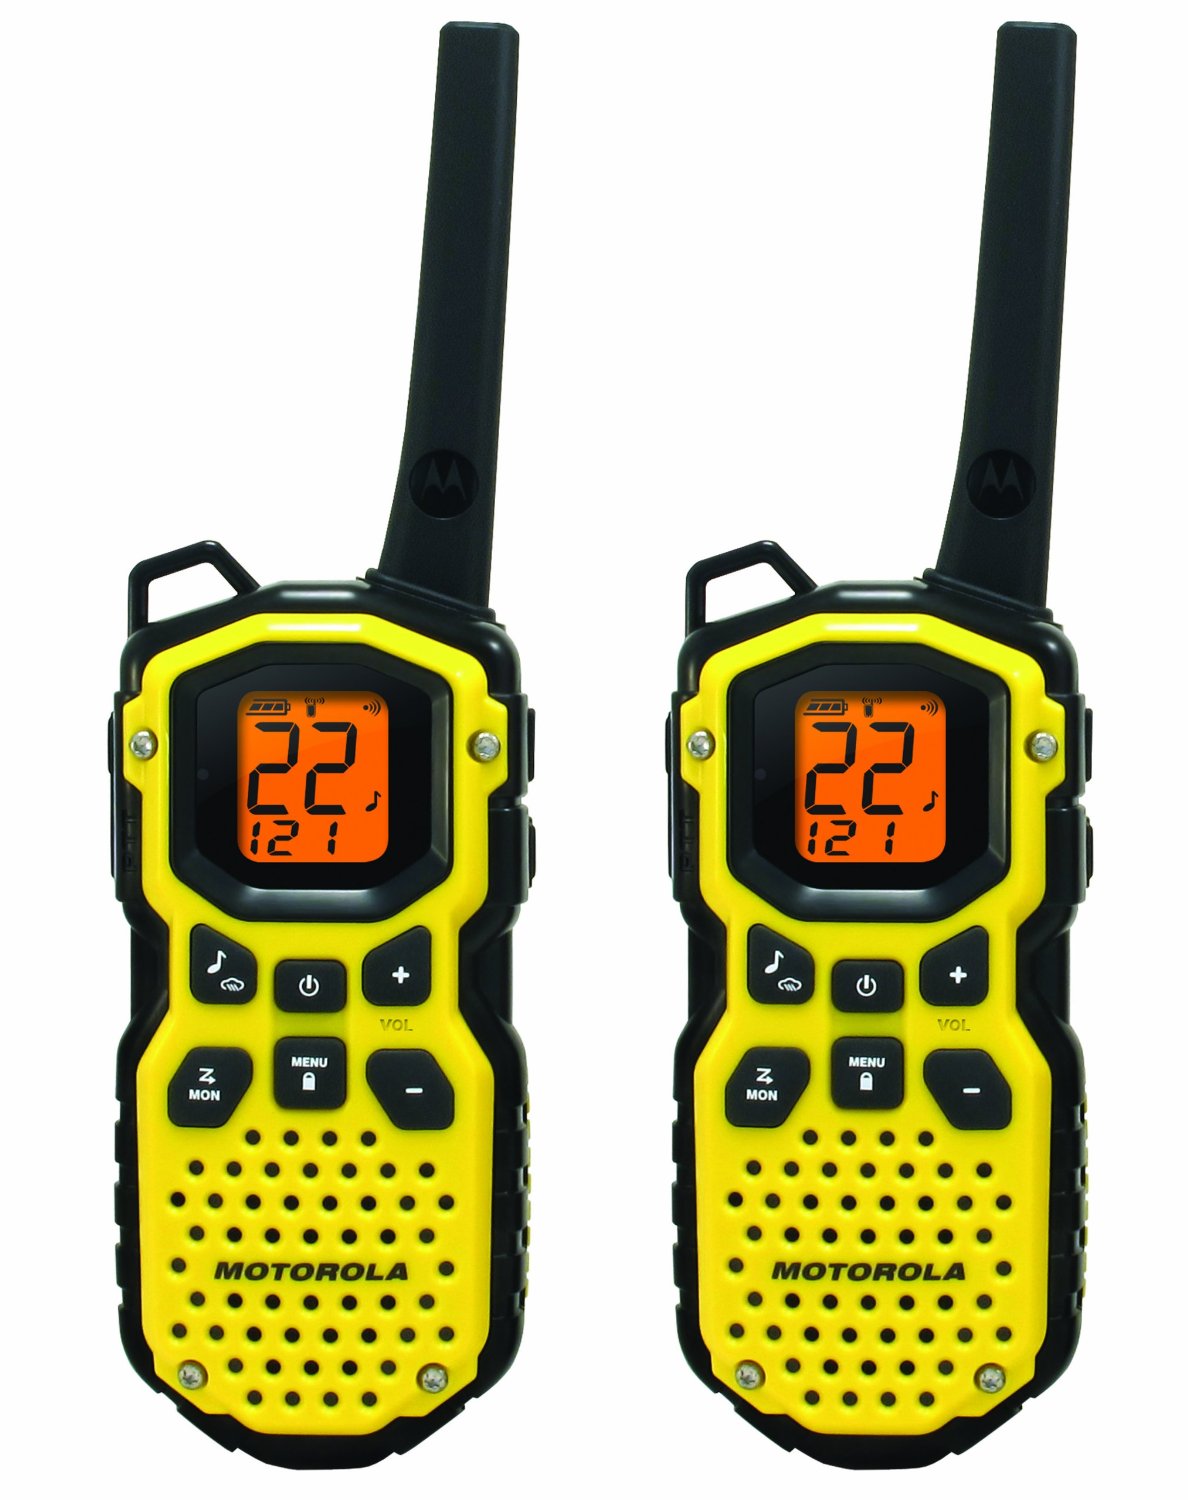
Prizes

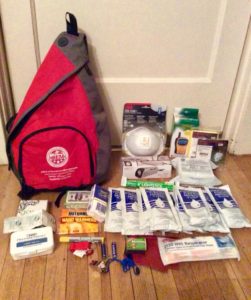
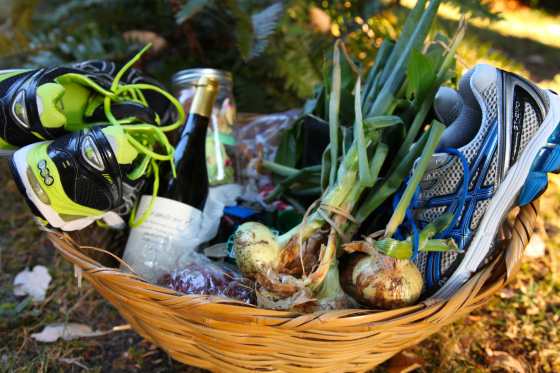
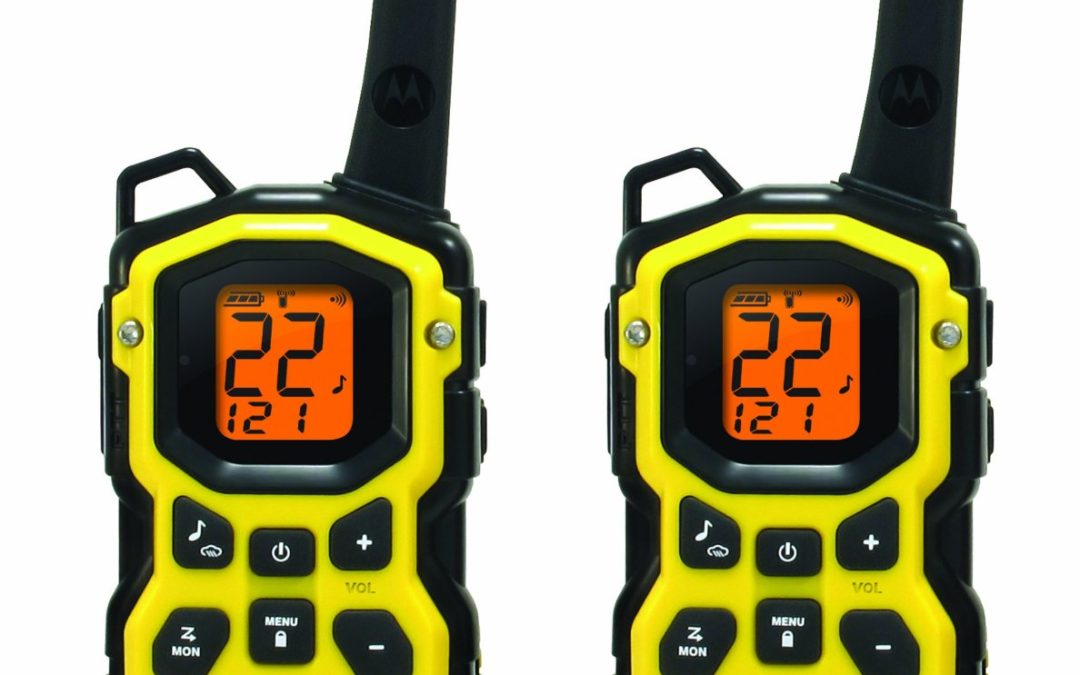
Having prizes is a good way to draw people to your event. They can be raffle prizes, door prizes (e.g.: The first 10 people in the door receive a utility shut-off tool), or trivia prizes. Our event at Lagunitas offered several trivia prizes.

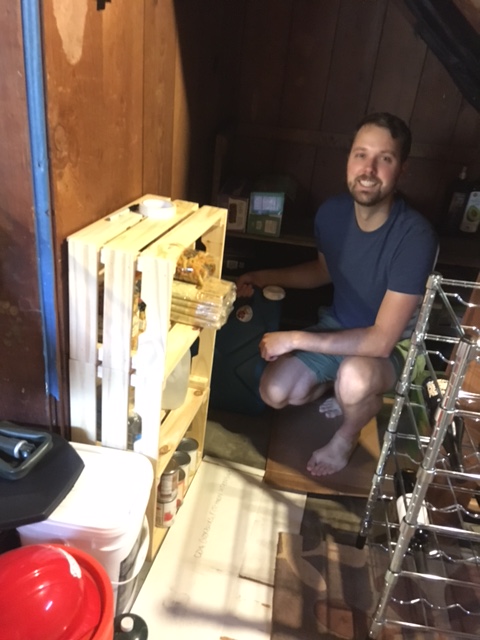
  1. Backpack Go-Kit – $0 (see photo)
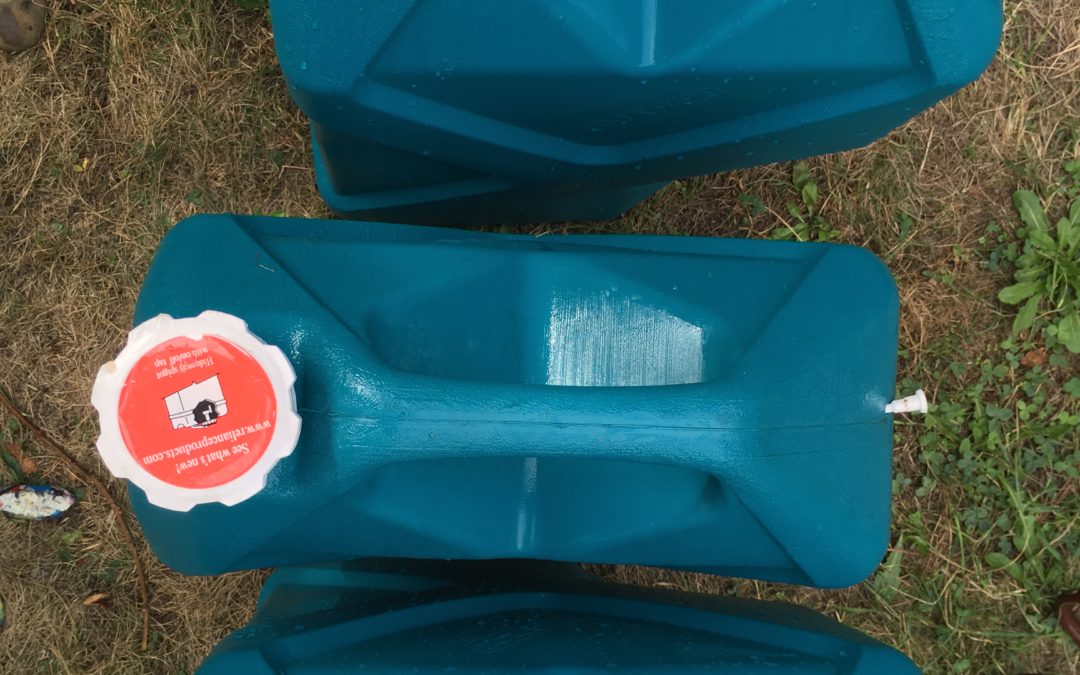
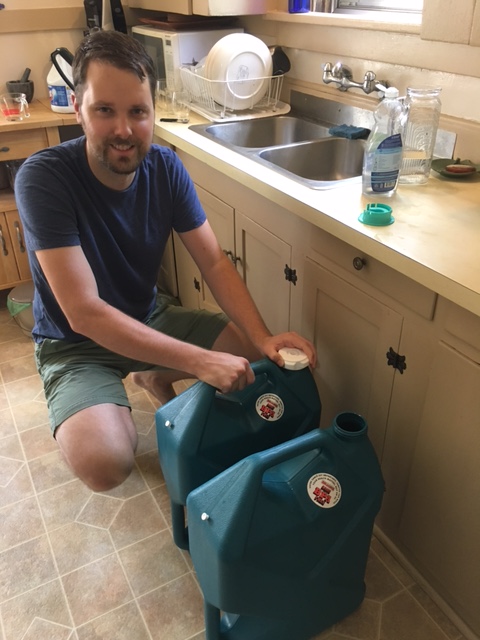
  2. Emergency Toilet Kit – $45 (see photo)
  • The buckets were free from Metro. Contact the Overlook NET if you’re interested in getting some. It’s not hard to find them from other sources.
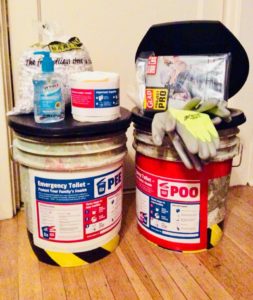
  • I got the shredded paper free at work.
  • I decorated the bucket with caution tape and disaster sanitation messaging materials from www.EmergencyToilet.org.
  • I bought the toilet seat lids online for $10 each because they’re not carried at Lowe’s or Home Depot outside of camping season.
  • I bought TP, gloves, hand sanitizer, and some heavy-duty garbage bags.

Donation Requests

This might be the hardest part for some people. But some people love it. Try to find those people. You’re more likely to get donations if the person asking is enthusiastic, personable, and not apologetic. And when soliciting donations, offer recognition on your Facebook event page, at the event, etc. Some ideas for who to ask:

  • Lowe’s will likely give you a $25 gift card, which you can use by itself as a prize or buy some items for a kit. Contact a store manager to request a donation.
  • Oregon Emergency Management sent me the backpack go-kit (see above). It was mostly stuff I could have gotten myself and assembled, except maybe the water packets. Another option would be to use an old backpack (or one from Goodwill) and fill it with things from the Dollar Store or Costco.
  • Ask restaurants in your neighborhood. Make a flyer for your event well in advance so you can bring it with you when asking for donations.
  • Ask your network. People may have small things they don’t need or can get for free through work or other connections. Think about how to leverage your network and their assets.
  • Ask KBOO to sponsor your event: https://kboo.fm/event-co-sponsorship-request

Communicate Early and Often

With your partners. My planning team used email but also a shared Google Doc to communicate. The doc evolved from informal notes we took during our event space consultation to a final, formal plan. We wrote comments to each other using the @ symbol, so it would send an email to the person to let them know they needed to answer.

With your volunteers. Send them the flyer and ask them to share it with their networks. A couple days before the event, send them details on how the event will go so they know when to show up and what’s expected of them. It’s a good idea to have them wear NET ID and vests so they’re identifiable. Be sure to thank them for volunteering.

With your prospective attendees. Get them excited by posting pictures on your Facebook event page. This may be the difference in turning an “Interested” RSVP into a “Going” RSVP (and actually showing up). Give them details about what to expect for food, drinks, the event schedule, parking, and whatever else they might want to know.

Accepting Cash Donations

Fundraisers are even easier now. In addition to the NET info table materials, you can now check out a PayPal card reader which will accept donations into the Friend of Portland Fire & Rescue account. You’ll just need to tell the PBEM NET Admin, Glenn Devitt, which day your event is, so he can put the money into the right NET accounts.

Grants as a Funding Sources

These fundraising events are great because you can raise enough money for team cache supplies, and you’re free to spend the money how you like. Grants, however, come with strings attached. You have to show that you’re going to spend grant money on something that the grant committee values, which depends on the source. For neighborhood coalitions, it is often diversity and equity work. Buying medical supplies and a pop-up tent is not diversity and equity work. So when you apply for a grant, think of how your NET can benefit but also how you’ll make a winning proposal that the grant committee is going to score highly. This is probably a topic for a different blog post, so I’ll stop there.

Final Words

Bring extra batteries, printouts of your volunteer assignments and schedule, pens, and whatever else you may need in a pinch (duh, we know how to be prepared). Oh, and of course – HAVE FUN!!

Katy WolfWritten by Katy Wolf
Team Leader, Boise/Eliot/Humboldt Neighborhood Emergency Team
Exercise & Training Coordinator, Portland Bureau of Emergency Management
pdxboiseprepares@gmail.com

FRS/GMRS Radio Primer UPDATE!

FRS/GMRS Radio Primer UPDATE!

This is an update to the previously posted FRS/GMRS Radio Primer article by John Beaston.

In its May 2017 meeting, the FCC made significant changes to the FRS and GMRS services. These rule changes are basically good news for NETs. Here’s a summary of the changes:

With the stroke of the pen, most hand-held, walkie-talkie combo FRS/GMRS radios will be reclassified as FRS-only radios. This was accomplished by raising the FRS maximum power level regulation to 2 watts (which covers the HIGH power setting on many radios) and by expanding the allowed FRS channels to include all 22 channels. These regulatory changes fold most existing radios under the FRS umbrella. And since the FRS service has no license requirement, any NET will be able to use any of the 22 channels.

What happened to GMRS? Well, it’s still there for those wanting higher power levels, detachable antennas and/or repeater operation. The GMRS channels now overlap the FRS channels so the two services can inter-operate on all 22 channels. GMRS users can still use up to 50 watts, have detachable antennas, and operate repeaters. As previously, a no-exam, $65 license is required but the license term has been extended from 5 to 10 years. As before, a call sign is issued and transmissions must be identified every 15 minutes. Basically, the potential for unwanted interference is so much greater with 50 watts, repeaters, and the potential of larger, higher antennas, the FCC wanted to be able to identify a user if it became necessary.

Note that higher power combo radios (such as the Midland GXT1000) and radios supporting repeater operation (such as the Motorola MS350R) will be reclassified as GMRS. A GMRS license would be required to operate these radios.

Eventually there will be no more combo FRS/GMRS radios. Any particular radio will be classified for one service or the other. The new rules took effect at the end of Sept 2017. Some provisions for manufacturers are phased in over 18 month to two years. This allows manufacturers to clear inventory, adjust marketing and develop new products.

Special Note on wide-coverage radios for NET

BaoFeng (and other wide-coverage walkie-talkie) radios are still not legal for transmitting on FRS or GMRS channels. The FCC ruling acknowledges that such radios exist however they explicitly deferred allowing their use on FRS or GMRS.


Written by John Beaston
Overlook NET ARO

What I’ve Learned About Water Storage

What I’ve Learned About Water Storage

The part of my personal preparedness that has taken me the longest to complete, and given me the most confusion, is water storage. I’ll share what I’ve learned so far, to help all the other confused procrastinators out there.

First I tried buying water in gallon containers or saving extra water bottles. A few got leaks as they got jostled around during camping trips, and I discovered their thin skins are best kept safe inside sturdy plastic containers and not moved a whole lot.

My ultimate goal was to store tap water in large quantities because of my aversion to paying for overpriced water from a corporation that might be taking it from a community that needs it more (see: Nestle/Cascade Locks water disputes). We have great water quality in Portland, anyway. But I wasn’t sure what kind of containers to use or how to sanitize them properly.

As I had a lot of glass mason jars on hand already, I decided to “can” my water. I used a sanitizing spray that I’d bought for kombucha-making on the jars and their lids. I filled them with water and put them inside a very heavy duty plastic bin from Home Depot in my basement. A couple months later, after learning more about the importance of sanitizing, I started doubting the integrity of my jar/lid seal (they didn’t have rubber seals), and decided to try a different method.

I found myself at REI with some dividends to spend and a sale going on. I knew I wanted to get some preparedness supplies, so I got the only water containers left – two 14-gallon containers that were quite large. I knew I needed to get up to that 14-gallon minimum because of the 1 gallon/day/person for two weeks rule of thumb. When I got home, I filled them up with water and left them in the basement. Later on, I learned you have to sanitize the containers with a touch of bleach before you add the water. So I poured them out, let them dry, and started over.

Eventually my boyfriend and I took the time to do it right. I got my instructions from the video How to Store Your Own Emergency Supply of Water, which was made by the Regional Water Provider’s Consortium. After following their instructions, we had our own take on things:

WHAT WE LEARNED:

  • It would be best to get water containers that fit into the kitchen sink so you can pour it directly from the tap into the container. Mine were too large, so we had to sanitize a pitcher, then pour it into the container. Also, I didn’t realize how heavy they would be once filled – I could barely carry them. Water is 8 lbs a gallon, so you know, you do the math.

  • Alternatively, a hose connection could reach from the spigot to the container. Ideally, a split connection with a timer, so you could just set it and come back to it when it was done. I know that homebrew stores have hoses because I dabbled with kombucha making, and that’s partially how I started learning about water storage.

  • You may have to do this sanitizing process every six months for the rest of your life (see below). So you should label your containers with the date you filled them. Since this process is time-consuming, streamline it as much as possible. Get that hose, or smaller container, so it’s easier for you to do it. We didn’t think the step of rinsing with soapy water was really necessary since the bleach rinse comes right after. The only way to tell if the sanitizing really worked is to check the water for scuz and taste it the next time you repeat the process in six months.

  • If you’re bottling water yourself, many recommend that you change it out every 6-12 months. Or you could add 1/8 teaspoon of chlorine bleach per gallon of water stored. This precaution will protect you against any lingering organisms that may have been inadvertently missed during the cleaning and/or filling process.

  • You don’t need to change it out every six months if you’re using commercially bottled water. Plastic may leach into your water over time, but in a true emergency it’s better to have more water than less, and short-term exposure to plastic will probably be the least of your concerns.

  • Most of us need to drink about two quarts of water per day to stay healthy. That’s half a gallon. When you’re stressed and/or working hard, you need even more to stay healthy. Living on a gallon of water per day (for drinking, cooking, and cleaning) is actually pretty challenging. While 14 gallons per person is a good starting goal, consider storing more. Much more. You’ll likely never say, “I stored too much water.”

  • If the thought of rotating your water supply overwhelms you or in any way prevents you from storing more water than you currently have – forget about it. Just get more and let it sit. You can always add bleach to it after a disaster strikes if it seems icky.

The photos seen here are of my boyfriend Matt filling the containers in the kitchen. We had to sanitize a pitcher to get the water in, which was inefficient. We’re considering getting a hose attachment. Matt puts the containers with our food storage, camping supplies, twin buckets, and my NET gear, under our basement stairs. The wine rack is also part of the emergency supplies 🙂

Want to help encourage others to store water? Take the #14GallonChallenge!

Katy WolfWritten by Katy Wolf
Team Leader, Boise/Eliot/Humboldt Neighborhood Emergency Team
Exercise & Training Coordinator, Portland Bureau of Emergency Management

Japan, Six Years Later

Japan, Six Years Later

Image may contain: one or more people, people standing and outdoorMy name is Mitch Bixby, and I’m the Team Leader for the Overlook Neighborhood Emergency Team (NET). I’m currently traveling in Tohoku, Japan with a group from Portland State University. We’re here as part of a class called Learn from Japan’s Earthquake and Tsunami Crisis. We’re exploring the areas most impacted by the Great East Japan Earthquake (GEJE).

Please join us for a discussion about the trip from 3-4:30pm on July 15 at PSU’s Smith Student Union, Room 296/8. Check out the event flyer and RSVP here if you plan to attend.

Below are excerpts from my personal blog. Contact me at OverlookPrepares@gmail.com with questions.

Off and Running

On Monday we were in Sendai, a Portland-sized city up the northern coast. Our class of nine spent the day at Tohoku University, one of several schools in Sendai and a leader is disaster planning for Tohoku (this eight-prefecture region) and for Japan. We’ve heard quite a lot this week about the Tohoku Recovery (meaning the three affected coastal prefectures) and how difficult it’s been. Japan’s planning processes needed to be completely re-written in the aftermath of the Great East Japan Earthquake (GEJE). It took a year to sketch out what planning now looked like, and another year to finalize plans. This period of adjustment, while critical for making wise choices, also prolonged people’s stay in temporary housing. Also, as folks settle in their “temporary” housing, going back to home communities becomes increasingly unlikely. The story repeats itself everywhere we go: the kids are in a new school, the fish patty company’s old buyers have moved on, and there are no jobs in the fixed-up neighborhood.

But without residents, what business would commit to returning? In an extreme example, after six years, the town of Rikuzen-takata’s grocery store will re-open next month. It’s a crazy game of chicken and egg that the Pacific Northwest really wants to get ahead of. Inability to keep people around Portland is a thing that gets talked about a lot in some circles. There’s no easy solution, but surely there must be conversations we can have and ways of prioritizing we can agree to in advance.

Yeah. And that’s the light, fluffy stuff. In the afternoon, we all piled into the bus and drove into Fukushima prefecture. We were headed to the small town of Iwaki, but took the, uh, scenic route. Driving through the little village of Namie, you could tell it was deserted. And then we started seeing roadblocks. Then some with guards. Then… are those radiation detectors? Oh, yes. And there, 20 miles off towards the ocean, is Fukushima Daiichi (“Reactor #1”) – five or six stories of lethal beige. And how many acres of radioactive waste disposal bags, snuggled in next to neighboring rice fields? We lost count. More to tell on Daiichi, but that’s for a Powerpoint. Suffice it to say, it was a very weird, very surreal bus ride.

Coming Up: The little seawall project, or “What does $106 million really get me?” Don’t go anywhere.

A Seawall in Usuiso

Image may contain: sky, ocean, beach, outdoor, nature and water
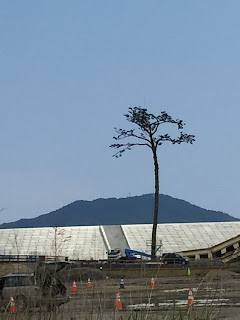
It’s a breezy day here on the Tohoku coast. I’m looking out at the ocean from the re-emerging Rikuzen-takata. One thing I’ve noticed (among many), is the widespread use of flags. Tour guides use them to lead their groups, construction sites use them everywhere. They’re usually the long and narrow type, on 6′ poles, now common on the Oregon coast and elsewhere. I gather this type was long-used by Japanese armies, so not really surprising to see them here. Perhaps more odd that it seems familiar.

I left the telling of things at Monday night, in the coastal city of Ishinomaki.  After a huge Japanese dinner on Monday, featuring such unsuspected delicacies as fried chicken cartilage and daikon root soup, we spent Tuesday touring a new seawall in Usuiso.  Pre-GEJE, it was a popular beach town, with good surfing, a little fishing fleet, and several hundred families.  Six years later, the new, higher levees include a large, newly-forested buffer zone and park, but the 14 surviving houses are srill all alone.  Surrounding hills have been flattened to provide fill for the control structures and a flat place for the re-drawn, smaller lots.  Yeah, redrawn.  It’s a kind of ’eminent domain’ called Land Readjustment that allows the government to redivide people’s lots for common structure.  Relatively rare before,  it’s now being done all up and down the coast.  I don’t think folks are necessarily excited about it, but it is what it is.  The relationship between the Japanese and their federal government is somewhat different…possibly more accepting…than in the States.

Our morning tour with the engineers revealed some of the amazing work that’s being done to move and compact each additional foot of soil.  The hillsides all around have gutters and drains, meant to keep them from saturating.  Those drains run right through the new subdivision, picking up overflow from each home’s septic tank before entering a common pipe that drains into the ocean.  Apparently, it’s common practice in less dense areas to deal with sewer this way.  The cost of connecting all, or any, the remote corners of Japan would certainly be huge.  Better to save sewage treatment for cities.  Who here works for Portland’s sewer bureau?  Oh, that’d be me…

During our break, Josh (our program coordinator) and Steve (from Arbor Lodge) and I walked along the seawall, which is now 7 meters high, around 23 feet.  And, while it’s impressive and while it’s low enough that people behind can look over and SEE a tsunami coming (an important criticism of some other seawalls), we couldn’t help but look across the road at the hills and think:  ‘ooo.  It would suck to  climb those.’  It seems there’s still a bit of glibness, some off-handed casualness in the discussion of these large projects.  “Save all that money,” the argument goes.  “Just make people go up.”  Mmm. Easy to say.

After lunch we heard from a guy on Usuiso’s Recovery Committee, who talked about how the recovery was going.  Interesting to hear how the local efforts developed, but, as we left, we stopped at  a shrine to the townspeople who had died.  He followed us, and began telling us about some of the names on the list.  He was remarkably stoic: as a volunteer firefighter, that’s kind of par for the course.  But, these are hard stories and mostly about the kids he had known, and, in some cases, had to retrieve from the wreckage.  Suffice it to say, these were the stories we expected to hear on this excursion, but I’ll leave it at that for now.

After returning to Sendai for the night, we heard from Tohoku University students and faculty Wednesday morning, before heading off to Rikuzen-takata in the afternoon.  More later…

Who Are These People, Anyway?

Yep, still alive over here!  Busy few days, and some minor plan shifts…

As folks start to ask more questions about the week, I realized I’ve never really introduced our class. As near as I can tell, this one-week class was the pilot for future field trips as PSU’s Hatfield School of Government develops a community disaster resilience specialization within their masters of public administration (MPA). The intention is to repeat this trip, for students and not-exactly-students like me, every year.

So, leading the trip were Dr. Masami Nishishiba, department chair and bigwig on community and organizational structure, and Dr. Hiro Ito, professor of economics with a focus on global economics. Obviously, this is grossly simplifies their interests and talents, so, my apologies. Did I mention they’re both awesome? Josh from Hatfield also joined us as program coordinator/’group photo herder extraordinaire and badly needs a vacation right about now. All three were raised in Japan, and all did substantial amounts of translation (both verbal and cultural).

The 9 of us were:
–me [with some preparedness/NET background and a smattering of other stuff]
–Barb [working on continuity plans for Portland Parks, is a FEMA reservist and professional badass]
–Kate [also working on her masters at PSU, she speaks Japanese, so we bugged her a lot]
–Evan [wrapping up his degree in Japanese Studies; bugged HIM a lot, too]
–Robin [retired from social work, daughter works with Josh;  always ready with a question]
–Larry [nearly retired emergency manager from Medford; always ready with a story, usually about being a paramedic in San Francisco in the ’70s…which, uh…that’s a different blog]
–Steve [a fellow NET from the next neighborhood over, he’s a construction manager for a local contracting firm, also in grad school]
–Rob [an almost-former architect working on his masters, with a really good camera usually in hand and an eye for detail]

In some important ways, this felt like a bit of a supergoup, with everyone chipping in some key insight or expertise.  There was nowhere we went where someone didn’t say, “oh, you know what this reminds me of…?”  And everyone got to be that person regularly.  I found that impressive and kind of thrilling.    It was also a group that stayed loose all week [although Mitchy got a little frazzled that last day or so…sorry, guys]. Mostly folks were just fun.  It doesn’t always work like that….

Is the Road Supposed To Do That?

Image may contain: one or more people, tree, plant and outdoorSo, back to the tale at hand, where I left off on Wednesday, 6/22, with a brief sketch of the morning in Sendai before going back to the coast.

Our presentation is Wednesday, and I’ve talked with Masami about this, were not good. Some scheduling goofs, sure, and some language stuff, maybe, but no coherent structure, even in the handouts. For me, it gets back to: what kind of information do the Japanese have to give, and what kind of information do we Portlanders need? Obviously, there’s no perfect overlap, so our challenge  as participants is to sort the two out. Personally, I’ve been trying to look at all of this through a NET lens; some talks have fared better than others. Our Wednesdays speakers have done intriguing work in the aftermath, but I struggle to find the relevance to Portland. Labor trends in Northern Japan, no matter how extensive the surveys, just…. I’m still working on it. Someone else in the group may very well be thinking “Oh, you know what that reminds me of?”

After a quick lunch, we jumped in our crazy little buslet, our demi-bus, our busette, and motored up to the mountain road to Rikuzen-takata. I’m putting in a hyphen that isn’t normally there, because it makes it clearer to my English-reading eyes where the pronunciation break is. In case you were wondering.

The trip up to the turnoff was hair-raising, even for me, because the bus’s suspension was so shot that, at highway speeds, any lane change or course correction caused the back of the bus to roll madly from side to side, to the VISIBLE consternation of our fellow motorists. Official protests from within the bus were lodged and received….

Fortunately, the bus behaved better at lower speeds and, once we turned off into the mountains, there was no doubting this road’s intention to have us drive at lower speeds. Which gave us a better look at the farms, the forests, the road up ahead/down below…

It’s worth noting here how much rice is grown in Japan. I’d never given it much thought, but apparently Japan is self-sufficient for rice, if not much else. The paddies are everywhere (EVERYwhere), including stair-stepped up these mountainsides. I’ve seen a bit of corn and some clover cover crops, but so far, it has been 98% rice. It’s like driving through Iowa, except I’d expect to see some soy even there. Here…nope. Is it possible that it’s being imported from Iowa?

This was also the road that will have inspired a post on native/invasive plants in Japan. There’s just no escaping it. OR knotweed. I don’t want to talk about it right now.

But I will.

So, this is the road with real switchbacks, but also something I’m not sure I’ve ever seen before: a corkscrew. The road descends off a pass, goes out into the valley on its concrete stilty piers, and then drops down under itself to continue down the valley. It just seemed so random and almost theme-parky, especially where they closed our lane for construction at the very bottom. I wish I’d had the presence of mind to take a picture, but I don’t evem know if that’d capture it. Too bad Barb slept through it. Sleeps on buses motoring through hairpin turns: Barb’s pretty hardcore.

As we made it through the mountains to the coast, the rain intensified, making our arrival tour pretty soggy. But that’s more related to other Rikuzen-takata stuff from Thursday. Stay tuned…

A Boost in Rikuzen-Takata

And we thought the seawall project in Usuiso was mammoth. And it is. $106 million is a lot of rolled quarters. But compared to Rikuzen-takata, that’s exactly what it is. It’s sofa change. Steve estimated the dirt required to raise the downtown by 12 meters (38-40 feet) would cost about a billion dollars, assuming downtown was, what, a square mile? Less?

When we arrived Wednesday evening, our planned tour of some key sites mostly got rained out. But we did stop at a service area, unusual to our eyes in that it featured grandstand-style seating, looking out over the… I wasn’t sure. Here it is in the rain (see photo right).

It’s about a 4-story concrete structure, and way up on the top, even above those slit windows, on the tiny roof of this thing, two guys survived the tsunami. Because the water wasn’t QUITE that high. It’s one of the scarier things I can think of, suddenly being a mile “offshore” in the middle of the ocean, when the only thing you know you can do on your own behalf is ‘stay put.’ And that might not be enough, either.

The other things on our tour would’ve been the Miracle Tree, the one surviving pine of an original 70,000. You can see the new seawall in the background (see photo left).

And we also would’ve seen the middle school where the teacher decided, given the duration of the earthquake, to lead students to higher ground beyond the designated meeting place. The designated location was, in fact, overwhelmed, but all the students were safe somewhere else, thanks to someone not following the rules. Mmm.

So, the leading advice from folks on the coast: run like hell when the ground stops shaking. Even after the new seawall, the new tidal gate, the newly-lifted downtown, that’s still the takeaway: go outside and git.

Because around here, that’s apparently easier said than done. It didn’t help that there had been a handful of false alarms, including just two days earlier. It sounds like many people blew it off. I wonder if the Oregon coast would have an equal but opposite reaction, of full-blown panicked dithering, that would amount to essentially the same result. I’d like to think not, but with mid-summer tourists around?

Next up: the value of NET training!

Hurtling Toward the “Finish”

So, I left off in Rikuzentakata, where mostly we heard from folks talking about surviving or rebuilding from a tsunami. The Japanese are pretty good at dealing with earthquakes; it was pointed out more than once that, without the tsunami, the damage and loss of life wouldn’t have been nearly as severe. The tsunami was much tougher.

This is one of those times of sorting out the overlap between what they had to offer and what we really need. Tsunami strategy translates easily to the Oregon coast, but for Portland, it’s not as clear. What other surprise risks do we need to prepare for? Uhh… if we knew….

We did hear from a firefighter, a cool guy we all said we wanted to go for a beer with. He worked for 51 straight days because 25% of their staff died helping people. We all kind of stared. That’s a conflict. That’s THE conflict for NET, but even more for the pros: Do your job fully and pay the price, or hold back and be around to help with the aftermath. Cruel choices.

I think that’s the place our afternoon exercise was coming from: practice making cruel choices, to see how we react. Unfortunately for the class, the exercise wasn’t probably robust enough to get us to the level of panic. Larry, who worked ambulances in the Bay Area during Loma Prieta, was completely unfazed, as was Barb, our FEMA reservist. But even the rest of us were kind of waiting for the stuff to get really horrible. Felt bad for the lady running it, ’cause her exercise had clearly unhinged previous groups. She certainly gave us things to think about, especially given her time in the GEJE aftermath, but I think she also learned a bunch from us.

Friday morning we heard more from city planners about reconstruction, and then headed down the coast to Ishinomaki. Ishinomaki is a city of about 100,000 people, and so more like Portland. There, we heard from one of the city’s disaster managers at the time, a practical man and (understandably) now retired. He talked a bit about shelters (had identified 16, now 100, all reinforced concrete) where they store supplies, like meals (had 12,000; now 50,000, mostly at government expense). Except, here’s the thing. If this happens again, they expect 70,000 displaced people, and assume 2 meals/day. Uh, math concerns….

So, expectations #1 and #2 are that people are bringing food with them, and folks know to do this. Expectation #3 is that food will arrive from outside by day 4, as it did in 2011. I don’t think any of these apply to Portland, so that’s, uh, something to think about.

Wrapping Up the PSU Week

The last day of the program (Saturday, 6/24), was a bit more of a blur than some other days, if maybe only because we spent less time on the bus! In the morning, we heard from a couple of folks working on replacement housing. Six years later, there are still 100,000 people in temporary housing! And the social dynamics are real. Throw a bunch of fishermen among the farmers, a crowd of folks on government assistance among the still-working…it gets tense. The big breakthrough was assigning housing by neighborhood, rather than by lottery, which helped keep some group cohesion. Apparently that was an important factor, although I could imagine it going the other way, too.

After checking out the early construction phase of their new development (adding layers of dirt for a couple years, remember), we visited some of future residents at a local Shinto shrine. Then, off to the oyster farm!  I gotta tell you, I’m not much of an oyster guy, myself, but getting out on the water, and watching these guys do their thing….an excellent way to wrap up the week.

Image may contain: 16 people, people smiling, people standing, mountain, sky, outdoor and nature
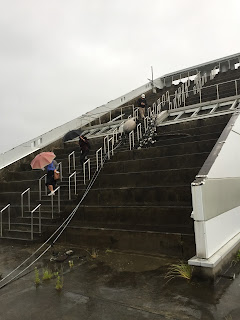
Well, not totally wrap-up. There was a group photo or TWELVE that had to happen first….but eventually we were, reluctantly, allowed to leave. Our hosts were very sweet.

I’m looking forward to getting everyone’s thoughts and revisiting with the group. We will be presenting our thoughts at PSU from 4-4:30pm on July 15 at (Smith Student Union, #296/8). Join us if you’d like to see the song and dance version (Tohoku: the musical!). Check out the event flyer and RSVP here if you plan to attend.

The Buy Nothing Project

The Buy Nothing Project

In the past week, three things happened that will enrich my daily life (and may come in handy after a disaster): I met a neighbor three blocks away who has kids the same age as mine, I got a free pea trellis, and I learned how to make fire cider – all thanks to a group I joined a year ago – the Buy Nothing Project. It has brought me into contact with people near me whom I would likely not have met otherwise.

What is Buy Nothing? It’s a Facebook Group. — Wait, don’t run! — If you’re a Facebook hater, please keep reading. This might be a reason to use Facebook, even if you don’t do anything else with it.

How Does It Work? Buy Nothing provides a structure for groups of neighbors to give or lend items they no longer need and ask for items they would like to receive or borrow. They can also give/receive services and gifts of time. Interactions begin on Facebook and continue on front porches and in living rooms. Ongoing relationships often result, and amazing acts of kindness abound.

WHAT DOES THIS HAVE TO DO WITH DISASTERS?

The four phases of emergency management are: mitigation, preparedness, response, recovery. Most disaster resources (including this blog!) focus primarily on things you can do by yourself that fall into the categories of mitigation and preparedness (like making an earthquake kit, making reunification plans, strapping your furniture, bolting your foundation, learning to shut off your utilities, and storing water).

But response and recovery are no less important, and planning for them means getting out and interacting with your neighbors. After the shaking stops, it’s our neighbors who will be there to physically and emotionally save us. After the dust settles, it’s our neighbors who will help us recover and rebuild. There just aren’t enough professional responders to “come save us.”

Living in a busy city in modern times often makes introductions and connections challenging. So how can we connect with our neighbors? Buy Nothing is one tool you may want to consider.

FACE-TO-FACE INTERACTIONS

In this semi-online, semi-offline community, true wealth is considered to be the web of relationships created between neighbors. The group encourages face-to-face interactions, and members often share stories with the group about the way those interactions have brightened their day.

Many members become friends on Facebook and in real life. Buy Nothing events have sprung up in my neighborhood. Last weekend there was a clothing swap, and the weekend before that there was a silent auction-style gift exchange with ice-breaker games and snacks. This spring there will be a Buy Nothing booth at our neighborhood cleanup event.

I often run into Buy Nothingers when I’m out in public. Sometimes I’ve met them in person, and sometimes I recognize their photo and introduce myself. I’ve only lived in this neighborhood for two years, but I already feel infinitely more connected than I did after several years of living in my former neighborhood.

SCARCITY AND ABUNDANCE

Buy Nothing creates a hyper-local gift economy. No money is exchanged at any point. Group administrators are volunteers, and they remind us that giving should not just be “haves” giving to “have-nots.” Everyone has something of value to share, and it’s amazing to see this in action. A group member who yesterday asked for toilet paper is today offering a bike he no longer needs. This highlights our community’s scarcity and abundance all at once.

While our resilience can be affected by our economic status, a strong community can mitigate the impact. I’ve seen Buy Nothing act as a community food bank and a way to keep ever-growing children clothed. And as we know, preparing earthquake kits can be challenging for community members who don’t have resources to spare. Through Buy Nothing I’ve been gifted bike helmets, water containers, backpacks, medical supplies, canning supplies, seeds, hiking boots, work gloves, and cabinet latches. I’ve seen others give and receive space blankets, canned goods, storage containers, propane fuel, tarps, buckets, flashlights, and tents.

COMMUNITY RESILIENCE IN ACTION

During our recent snow storm, one member offered free childcare to parents who couldn’t take any more time off work. Another offered transportation to those who wanted to avoid mass transit delays and/or didn’t have a vehicle with snow chains. Sidewalks were shoveled, salt was sprinkled, food was delivered, sleds were gifted, and stir-craziness was abated.  

–> Last month a new mom got her bike and work bag stolen. Group members gifted her new bike panniers and a breast pump.

–> A few weeks ago, a group member gave birth to premature twins, and Buy Nothingers offered to run errands, give her postpartum items, provide emotional support, and set up a meal train for the family.

–> Last week a member asked for a ride to her citizenship test, and offers of rides, support, and encouragement rolled in.

–> Yesterday two Buy Nothingers helped another member with mobility issues by sweeping the pine needles off her roof, unclogging her gutters, and washing them out with a gutter cleaner they got from the North Portland Tool Library.

–> Today a member invited others to join him for a mending party as he works through his pile of clothing that needs patching and darning.

SUSTAINABILITY

Declutter, save money, meet your neighbors, get a new lamp shade, save the world! Buy Nothing also has an impact on our environment and cash economy. It keeps usable goods out of landfills, reduces carbon emissions, and reduces our reliance on corporations. And as Buy Nothingers share their skills, they are helping others learn to make and fix instead of toss and buy.

“Rethinking consumption and refusing to buy new in favor of asking for an item from a neighbor may make an impact on the amount of goods manufactured in the first place, which in turn may put a dent in the overproduction of unnecessary goods that end up in our landfills, watersheds, and our seas.” — https://buynothingproject.org/about

LAY OF THE LAND

I’ve noticed a hidden benefit to participating in Buy Nothing: I’m learning the physical layout of my neighborhood. As I drive, bike, and walk to my neighbors’ homes, I’m getting to know the streets and landmarks of my community. I’m sure you can see how this might be useful to a Neighborhood Emergency Team member after an earthquake.

IMMEASURABLE BENEFITS

Buy Nothing has brought me immeasurable benefits. I’ve strengthened my connection to my community, saved gobs of cash, beautified my home, added to my emergency preparedness kits, learned new skills, and felt the joy of giving. A few weeks into it, I couldn’t stop looking for items in my house to give away. A few months into it, I stopped thinking of it as a cool way to get stuff and started seeing as a way to connect with people and unplug from the system. With each passing day, my family is more resilient and therefore more prepared for all stages of a natural, manmade, or personal disaster.

There are currently 80+ Buy Nothing groups in Oregon, including 18 in Portland. As groups grow, they “redistrict” and split apart into even more hyper-local groups. To learn more, visit the Buy Nothing Project website and watch this video.  

Written by Laura Hall
Assistant Team Leader
Arbor Lodge / Kenton NET
ArborLodgePrepares@gmail.com

Are Our K-12 Schools Ready for The Big One?

Are Our K-12 Schools Ready for The Big One?

Picture this: A bookshelf packed with heavy materials located next to an exit, a large steel teacher’s desk on wheels that don’t lock sitting in the middle of a classroom, a tall filing cabinet next to student desks, folded cafeteria tables on wheels lining the walls of a gymnasium, a piano on wheels sitting in a hallway, lockers not attached to walls… Okay, now picture what happens when a 9.0 earthquake hits.

Yikes.

One of the questions I hear most frequently from my neighbors is: How are our schools preparing for a major earthquake? I can’t speak about private schools, but I can say that our public schools are doing the best they can with the resources they have – which is to say, not enough.

Portland Public Schools

Thanks to bond measures passed in 1995 and 2012, Portland Public Schools has completed seismic upgrades to many of their buildings. They also require schools to do earthquake drills twice a year, and some (but not all) schools have stockpiled emergency supplies and water. This is a good start, but it’s not enough to ensure all children’s safety during a massive earthquake.

Non-Structural Hazard Mitigation

Non-structural hazard mitigation encompasses many types of preparation, but the most relevant for this conversation is the securing of a building’s contents that could become hazardous during an earthquake – like that bookshelf by the only exit of a 1st grade classroom. Securing that bookshelf might be one of the best and easiest ways to prevent loss of life for those 1st graders.


As much as the hard-working folks at PPS would like to secure all of these hazardous items, they don’t have a budget for it. And it’s not because they don’t care. It’s because they’re faced with SO MANY other urgent issues and an incredibly restrictive budget. And because by and large, people don’t voice their concerns to administrators and elected officials about this topic.

Okay, political rant complete.  Besides allocating more money, what can we do?

Parents4Preparedness

Parents, teachers, and administrators are working together to find creative solutions. The group Parents4Preparedness (P4P) was formed in 2015 by a group of concerned parents. They meet every two months during the school year to advocate for sufficient earthquake preparedness resources, promote best practices, and share information to improve the resiliency of Oregon’s schools.

These are parents who have had some successes (strapping furniture, leading parent/child reunification drills, etc.) who are trying to reach out to other parents to share what they’ve learned. Unfortunately, it’s not as simple as buying some brackets and “getting someone to do it.” There are liability issues to consider. There are schedules to consider. There are busy, busy teachers to consider. There are 100+ year old buildings with lead paint and weird materials in the walls to consider. And there are very serious equity issues to consider.

Mercy Corps Information Campaign

One of P4P’s co-facilitators, Susan Romanski, is the US Director for Disaster Preparedness & Community Resilience for Mercy Corps. Now through the end of the 2016-2017 school year, Susan is offering to do 90-minute earthquake preparedness presentations and facilitated discussions for PPS schools that request it. She’ll cover basic steps to prepare families, communities, and schools for a Cascadia event. Her presentations can be offered in English or Spanish. Here’s the catch – a parent (or group of parents) has to take this on. They need to organize the event, publicize it, and work with the school’s administration to make it happen. Parents interested in arranging a presentation at their school should carefully read this flyer.

Neighborhood Emergency Team (NET) member participation is welcome and encouraged at these events. Once an event is scheduled, the NET Team Leader in that neighborhood will be contacted, and the TL can attend the event or find someone else on the team to do it. The NET can introduce themself, share their NET experience/activities, or simply explain what NET is. This can create a bridge between the parents and the NET. 

2017 Bond Proposal

Work is currently being done on a new PPS Health, Safety, and Modernization Bond proposal for May 2017. This bond is our only hope for funds that will continue to make schools safer for the next 6-8+ years. There are no other options for capital funds in the amounts needed – not from the City of Portland, the State of Oregon, or FEMA. We must persuade our friends and neighbors that these investments in safety make sense.

The first meeting with opportunity for public testimony is from 6:30-8pm on Thursday, February 2 at Madison High School. There will also be a School Board meeting on February 6 and additional town halls on February 7, 8, and 9. See the district’s bond website for details and complete this very brief online survey before February 10th.

Help Us Get the Word Out

Your help is needed in getting the word out about P4P, the Mercy Corps presentations, and the 2017 bond. We especially need to make sure that parents in underrepresented communities hear about this. So please, spread this far and wide. I know parents are overwhelmed with other issues, but this is an issue that threatens thousands of children’s lives.


Written by Laura Hall, Assistant Team Leader, Arbor Lodge / Kenton NET, ArborLodgePrepares@gmail.com
(Thanks to Ted Wolf for contributing. Ted is advocating on behalf of P4P on the 2017 bond proposal.)

FRS/GMRS Radio Primer UPDATE!

FRS/GMRS Radio Primer

FRS/GMRS radios are the go-to radios for most intra-team NET communication. Every NET member should have one in their go-kit. Here’s what you need to know about the world of FRS/GMRS to be an effective (and legal) FRS/GMRS operator. There is also some buying advice for those who still need to get their radio.

The Services

FRS and GMRS are two overlapping radio services defined by the FCC.

FRS (Family Radio Service) is free, and no license is required. It offers a short range of operation due to low power and antenna restrictions.

GMRS (General Mobile Radio Service) covers a much farther range through higher power and the options of external antennas and repeater operation. However, it requires a license. The license is $65 for 5 years with a simple, online application. There is no exam. The license covers your entire “family.”

The services have 22 channels – some are shared and some are exclusive for the particular service.

Being Legal

It is your responsibility to operate your radio in a legal manner.

  • If you do not have a GMRS license, you may only operate on channels 1-14 and only with low power.
  • If you have a GMRS license, you may operate on any of the 22 channels with the maximum power shown on the chart.

Each NET team is assigned a channel from 2-7. Channel 1 is informally recognized as a national calling channel for emergencies. Using the shared FRS/GMRS channels allows for teams to have both unlicensed and licensed team members. The non-licensed members are restricted to low power while the licensed members may use higher power.

Ninety-nine percent of today’s consumer handheld radios cover both services. The exceptions are GMRS-only radios which we’ll cover below. All of the dual-service radios automatically reduce power on the FRS-only channels 8-14. On the shared FRS/GMRS channels 1-7 however it is the user’s responsibility to use low power if they are not licensed. While it is simple to do, each manufacture has a different way to do this. Some radios (newer Motorola models) have two PTT (Push-To-Talk) buttons – one for low power and one for high power. Nice and simple. Other radios (Midland, et al) have a menu option to set power level on a channel-by-channel basis.  It seems that these radios come from the factory with the default power level set to high. If you are not licensed, you will need to consult your radio manual on how to reduce power on the shared channels.

One caveat: A few older dual-service radios do not have the ability to reduce power on the shared FRS/GMRS channels. Unfortunately, this renders the radio useable to GMRS-licensed members only. If you think you may have one of these radios, your team ARO may be able to help you check if you are concerned.

Of course, in an emergency involving the threat of life safety or imminent property damage, you may operate on any channel with any power level.

The Ideal Radio

Manufacturers offer a huge range of FRS/GMRS radios. The choice is staggering and the selection seems to change monthly as models come and go. Prices range from $25 to $150. How to choose? While Portland NET cannot officially recommend any particular radio, the RTL (Radio Training Liaisons) have pooled our collective wisdom and come up with the following suggested feature set and a list of radios that come close to meeting them.

Suggested features:

  • Supports both low and high power
  • Weather resistant or waterproof
  • Supports multiple battery options, particularly AAs
  • Includes earbud/mic
  • Desktop charger
  • FM and NOAA reception
  • Repeater capable


Motorola T4xx/T6xx series Motorola MS350R/MS355R Midland GXT series
Supports low/high power yes yes yes
Weather-resistant or waterproof T4xx weather-resistant
T6xx waterproof
Waterproof Weather-resistant
Supports AA batteries yes yes yes
Includes earbud/mic T465 only MS355R yes
Desktop charger T480
Others use wallwart
yes yes
FM and NOAA reception T480 FM+NOAA
Others NOAA
NOAA NOAA
Repeater capable no yes no

The GMRS-Only Option

As of late 2016, there are two GMRS-only radios. Basically, a GMRS-only radio gives up the ability to transmit on the FRS-only channels (7-14) but retains the shared FRS/GMRS channels and gains the options of higher power and use of an external antenna. Both can significantly increase the available range and could be useful for teams needing more geographic coverage.

The Midland MXT100 is a mobile GMRS-only radio with five watts and a magnetic-mount external antenna. It does not contain batteries but uses a cig-lighter plug for powering off a vehicle 12v system. The radio is quite small and includes a quick release bracket for easy vehicle changes. Here’s a link to an earlier, more detailed NET review.

The BTech/Baofeng GMRS-V1 is a handheld GMRS-only radio. It has the ability to transmit on any GMRS channel including GMRS repeaters. It can also be programmed to receive VHF/UHF ham, public service, NOAA, and FM broadcasts. It has a replaceable antenna. It is also a 5-watt radio. Many battery, antenna, and earbud/mic options are available.

What About the Baofeng UV-5R and Their Ilk?

As they say, “It’s complicated.” Basically, the UV-5R is not FCC accepted for either FRS or GMRS. While it is possible to program the UV-5R to transmit on FRS/GMRS frequencies, it is illegal to transmit on those channels except during an emergency. That little caveat is why many NET AROs have a UV-5R in the radio stash. NET AROs can use the UV-5R as their ham handheld and monitor FRS/GMRS channels at the same time. They typically have a regular dual-service FRS/GMRS handheld for transmitting on the channels. If push came to shove in an emergency, they could use the UV-5R for FRS/GMRS as well as ham.

GMRS Repeater Notes

The FCC allows for repeaters in the GMRS service. A GMRS repeater can dramatically increase the coverage area. There are currently no GMRS repeaters in the Portland area although several NET teams in geographically challenging areas are considering them. If anyone is interested in the topic, a good resource is myGMRS.

Written by: John Beaston, Overlook NET, K7TY, k7ty@arrl.net

Gear Review: Midland MXT100 GMRS Radio

Gear Review: Midland MXT100 GMRS Radio

The Midland MXT100 is a GMRS-only radio. The manufacturer’s list price is $150, but is currently listed on Amazon for $119. Locally you can find it at Bimart for $130.

FEATURES

(from Midland website)

  • Full 5W Radio + External Magnetic Mount Antenna for extended range
  • 15 High and Low Power (GMRS) Channels *FCC License Required
  • 142 Privacy Codes to block other conversations
  • Channel Scan (to monitor radio activity) with Controlled Frequency Synthesizer
  • High-Grade Microphone
  • Silent Operation when beeps/tones are not desired
  • Flip-Frame Detachable Mount to install on or under dash
  • High Contrast (back-lit) LCD for daylight or night use
  • 12 V Car Power adapter (included)

CONDITIONAL RECOMMENDATIONS FOR NETS: 

  • Unlike FRS/GMRS handheld radios, this is a GMRS-only radio. A GMRS license is required, which costs $65 every five years and is good for all family members.
  • Supports only GMRS channels (channels 1-7 and 15-22). FRS-only channels (channels 8-14) are not supported. This may limit some teams on their channel selections.
  • Recommended for NET Amateur Radio Operators (AROs) operating from home, at a fire station, or in a vehicle. It would be a good complement to a FRS/GMRS handheld. The ARO needs to have a GMRS license in addition to their ham license.

GOOD THINGS:

  • It’s very compact and would be easy to mount in a car. It’s much smaller than mobile ham radios. It includes a quick-release mounting bracket so it could be easily removed when not in use.
  • 12 volt powered – no internal batteries. Included cigarette lighter plug allows for easy in-vehicle operation and quick swapping between vehicles. Could also use larger capacity external 12-volt batteries. You don’t have to worry about AA/AAAs.
  • Higher power than handhelds (5 watts vs 2-3 watts). Gives a practical range of 3-4 miles when communicating with handheld radios. Handheld-to-handheld range is typically 1-2 miles. This was tested within the Overlook NET area.
  • External magnetic mount antenna allows for easy placement on a vehicle roof or other metallic surface. The included antenna is quite a bit better than those on handheld radios. You could also use many ham base station UHF antennas.
  • Very easy-to-use. No channel programming needed as with some general UHF mobile radios.
  • Fast channel scanning speed. And individual channels can be included or excluded from the scan, so the team’s main and backup channels could be scanned without needing to listen to other channels.
  • Good build quality.

NOT-SO-GOOD THINGS:

  • No support for GMRS repeaters.
  • No support for FRS-only channels (8-14). It is a GMRS-only radio.
  • Quite a bit more expensive than even the best handheld FRS/GMRS radios.
  • Not compatible with regular external speaker/mics. However, the included microphone seems quite good and there’s a connector for an external speaker.
  • The display is small and a bit hard-to-read even with illumination turned up.
  • No automatic power-off, so it could drain the external battery if you’re not careful. Most handhelds have an automatic power-off setting.


Written by: John Beaston, Overlook NET, K7TY, k7ty@arrl.net

Credit: Thanks to Marino KG7EMV for the loan of the radio.

Equipment Tips and Tricks: Recharge Your Batteries

Equipment Tips and Tricks: Recharge Your Batteries

In this episode of Equipment Tips and Tricks, I talk about recharging your batteries. I talk about hybrid rechargeable batteries, smart chargers, and show off a neat piece of kit for storing them.

Equipment Mentioned in this Video

Full Transcript of the Video

Hey there Portland NETs and everyone else interested in community emergency response equipment tips and tricks—my name is Taylor. I’m a volunteer with the Kenton-Arbor Lodge Neighborhood Emergency Team in North Portland Oregon. Today I’m talking about recharging your batteries.

A lot of us are using rechargeable batteries in our kit. These Nickel-Metal Hydride batteries are all over the place. Supermarkets and connivence stores as well as big-box your regular electronic retailers. So, what’s the person to buy?

Well, the batteries you want to buy if you’re looking for rechargeables are going to be Nickel-metal Hydride. There might be some Lithium cells out there on the market, but by-common, you will find NiMH or Nickel-metal Hydride batteries.

Now, specifically, you should be thinking about picking up the versions that are marketed as hybrid batteries. These have a different chemical structure which allows them to retain their charge while they’re just sitting there on the shelf for quite a long time.

The most known brand of these are called Eneloop. That’s their logo! Although you’ll find others, such as these Rayovac Hybrids, on the market. You can go online and find all sorts of reviews. In the end, it’s the shelf-stableness of them that you’re going for. They’ll kind of sit there with their charge for a good couple of months. Unlike normal Nickel-metal hydride rechargeable which will deplete very quickly sitting on a shelf. So that’s the batteries you want.

Now, how do you store them? Well, I love these little carriers. They’re kind of on the spendy side, but so convenient. And what really makes them nice for rechargeables is that you can use them to determine, at a glance, whether that rechargeable is charged or depleted. How I do this is I store them with the positive terminal down if they’re charged. And when they’re depleted, you just flip it the other way and at a glance, you can quickly see which of your batteries are good to go and which you need to replace.

Of course, there are lots of different to store your batteries –whatever works for you. Just make sure you’re not contacting them so they create a short circuit and y’know, blow up or something.

The last thing you’re going to need is a charger. Again, lots of chargers on the market. What you want to look for is a smart charger. Something that can really detect the voltage on that battery and condition it over time to make it last as long as it can.

So this is one such variety. This is made by LaCrosse. There are lots of different models out there. Basically a smart charger is always going to have some sort of screen to tell you what’s going on with the charger. You’ll be able to see that, perhaps the current — how much current is being put into the battery at any time. Slower is better. Fast chargers are not as good. And you might be able to set it to be a refresh or recharge mode, which will completely drain the battery and then charge it all the way back up to get it’s maximum potential.

So, again: Hybrid batteries. A good way to store them. And a smart charger.

Choosing rechargeable batteries for your emergency kit is a personal choice. I prefer to use rechargeables on the things that I use on a constant basis such as my headlamp or that I have sitting around for radio usage or something to that effect. In my actual emergency kit — the one that’s in the garage kind of stored away—I have just regular alkaline batteries sitting there. And that way I don’t have to worry about them going bad for tens of years, rather than just in a couple of months. Also, alkaline batteries a lot less expensive so I can have a larger supply sitting there, without needing to invest in so heavily in the rechargeable batteries.

If you have anything to add about this topic, head on over to YouTube—that’s where we’ve got the comments—of course you can subscribe there as well. And as always, Portland, keep Portland prepared at portlandprepares.org. I’ll catch you next time.